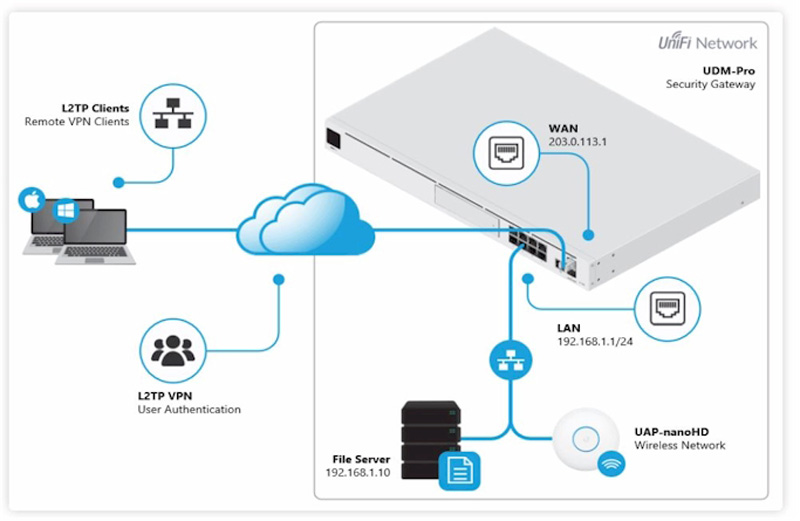
Unifi USG: Configuring L2TP Remote Access VPN
Add the L2TP VPN client configuration to your computer. Follow the steps below :
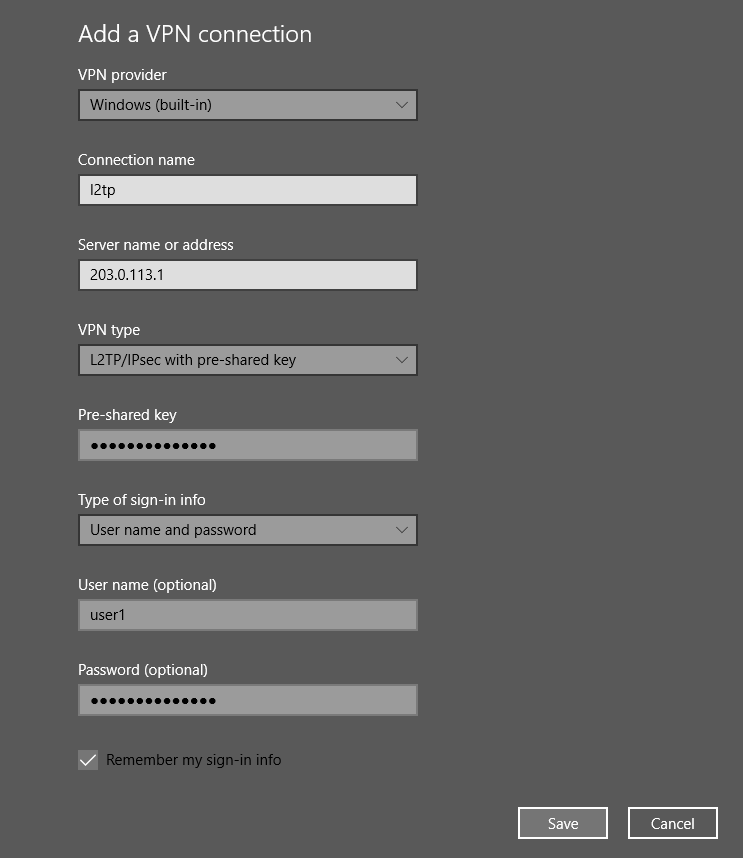
1. Add a new VPN connection in the Network & Internet settings.
Settings > Network & Internet > VPN > Add a VPN connection
VPN Provider: Windows (built-in)
Connection name: l2tp
Server name: <ip address or hostname of usg/udm>
VPN Type: L2TP/IPsec with pre-shared key
Pre-shared key: <shared-secret>
Type of sign-in info: User name and password
User name: user1
Password: <user1-password>
2. Navigate to the Windows 10 network connections to change the allowed security protocols.
Settings > Network & Internet > Status > Change Adapter Options > L2TP Adapter propertiesbsp
3. Select the Security tab and set the authentication method to MS-CHAP v2.
Security > Allow these protocols > Microsoft CHAP Version 2 (MS-CHAP v2)
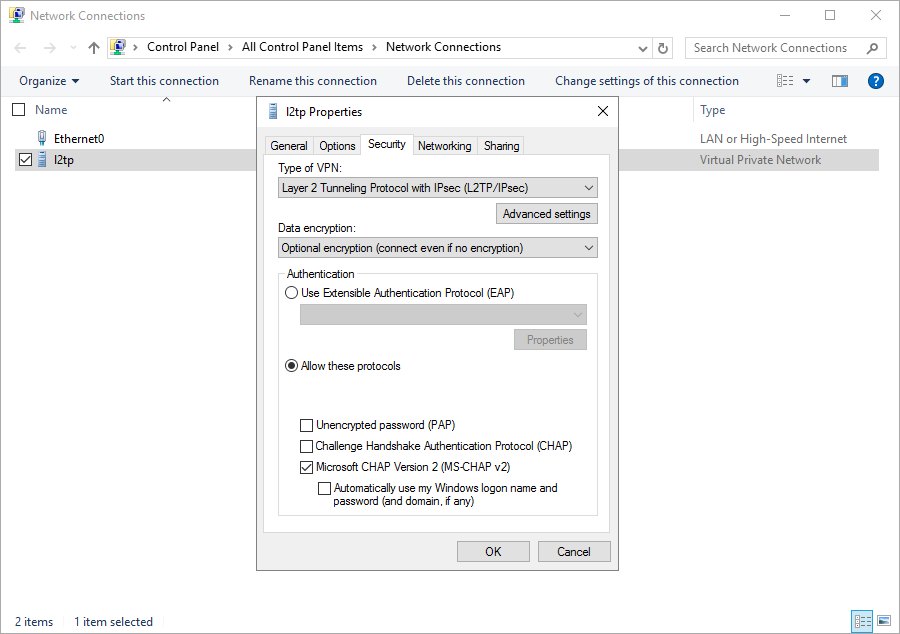
4. Click ‘OK’ to save the new changes.
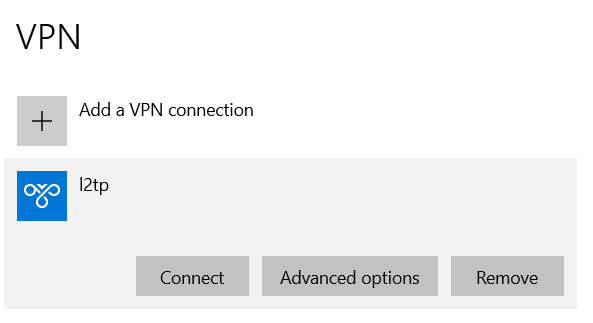
5. Navigate back to the VPN connection (Settings > Network & Internet > VPN) and click ‘Connect’ to join your network.


Can’t find your programmer?
We have one… give us a call to see how we can help.
We have been customizing this system, from back when it…